> For the complete documentation index, see [llms.txt](https://mintpad.gitbook.io/docs/llms.txt). Markdown versions of documentation pages are available by appending `.md` to page URLs; this page is available as [Markdown](https://mintpad.gitbook.io/docs/nft-media-types/media-metadata.md).
# Media metadata
Metadata consists of relevant data for each token, including its attributes and its number of attributes ([OpenRarity protocol](https://www.openrarity.dev/)). It's important to note that deploying a collection on a chain does not require metadata, although it can enhance the token's information and value.
Depending on the type of collection, metadata can be set automatically or manually. Here are the differences:
### "**Editions**" and "**Drops**" collections
At this type of project, users must manually set the metadata attributes for their artworks. Regardless of the collection type, you can specify the metadata for each token individually. This means you can specify metadata for each token individually or apply standard metadata to all tokens.
In "Editions" collections, the number of NFTs created with the same media depends on the collection size. However, you can specify metadata separately for each token.
Let's review the different steps and options:
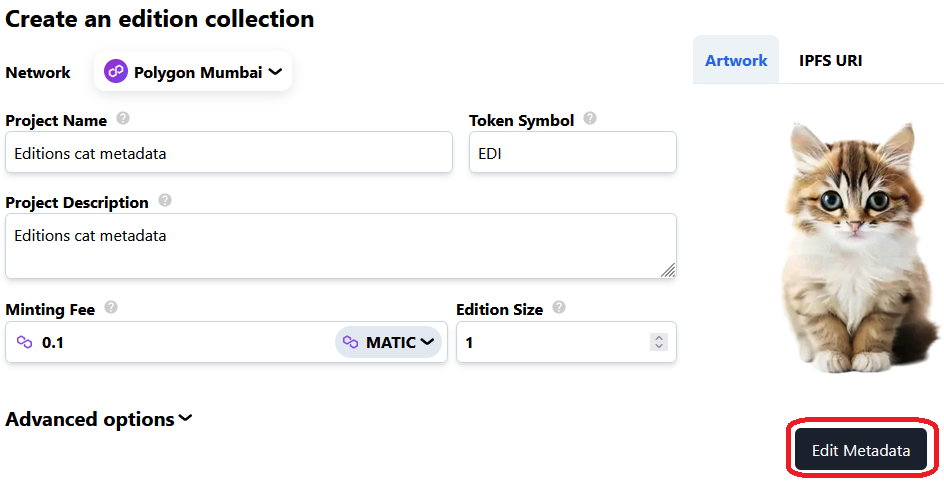
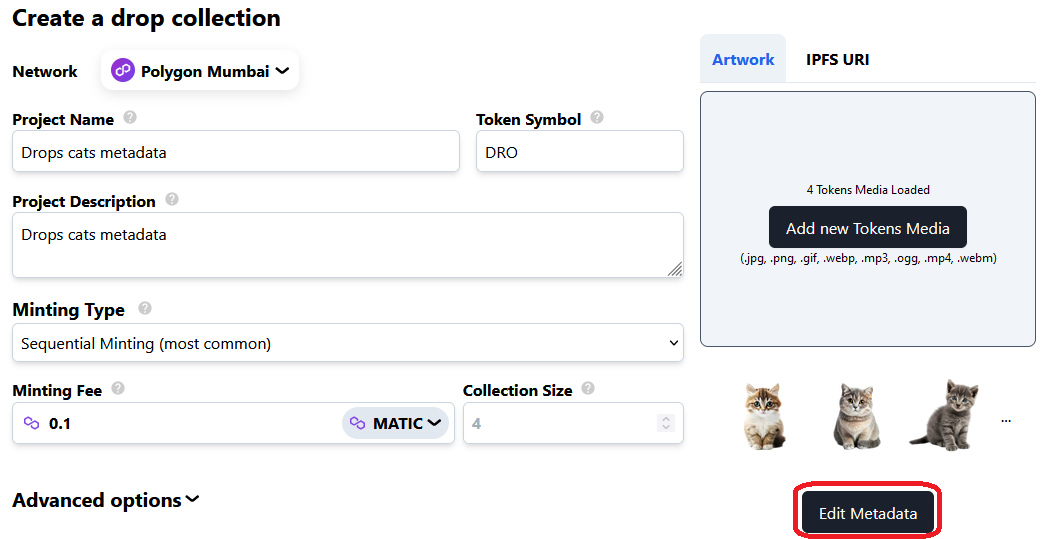
1. Firstly, we will encounter an "edit metadata" button after adding media. Below, we can observe this in both the "Editions" and "Drops" collection types:
Editions edit metadata option
Drops edit metadata option
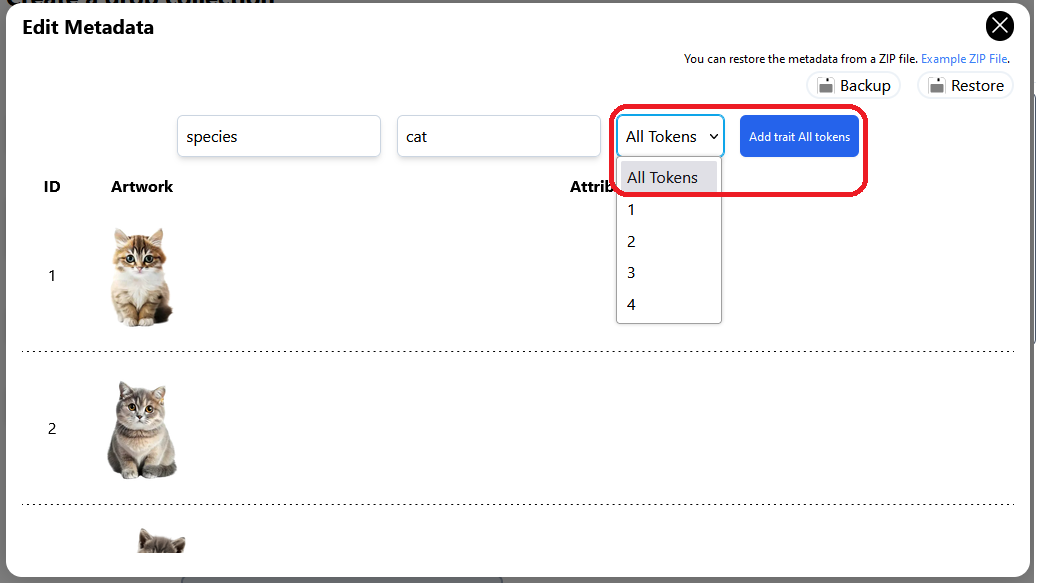
Then, a modal is displayed where you can simultaneously set the metadata for either one or all tokens. Within the modal, there are two fields. The first is for the trait name you are assigning, and the second is for the trait value.
To set the same metadata trait for all tokens, select the "All tokens" option and then click on the "Add trait All tokens" button.
Once you do that, you will see that the trait is added to all tokens in the collection.
If you need to delete a metadata attribute, you can do so by hovering your mouse over it and then clicking on the "DELETE" option that appears.
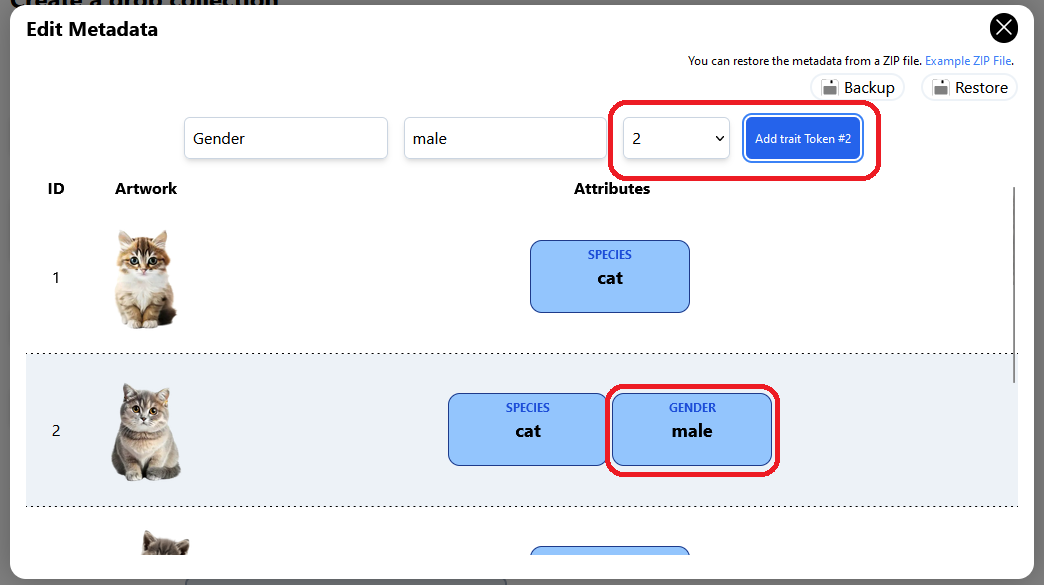
On the other hand, you can add a metadata attribute to a specific token. Fill in the metadata attribute fields and then select the token ID. Then, an "Add trait Token #" button is shown; you need to click on it to add that attribute. That trait is only added to the specified token (#2 in this example).
Add metadata attribute to only one token
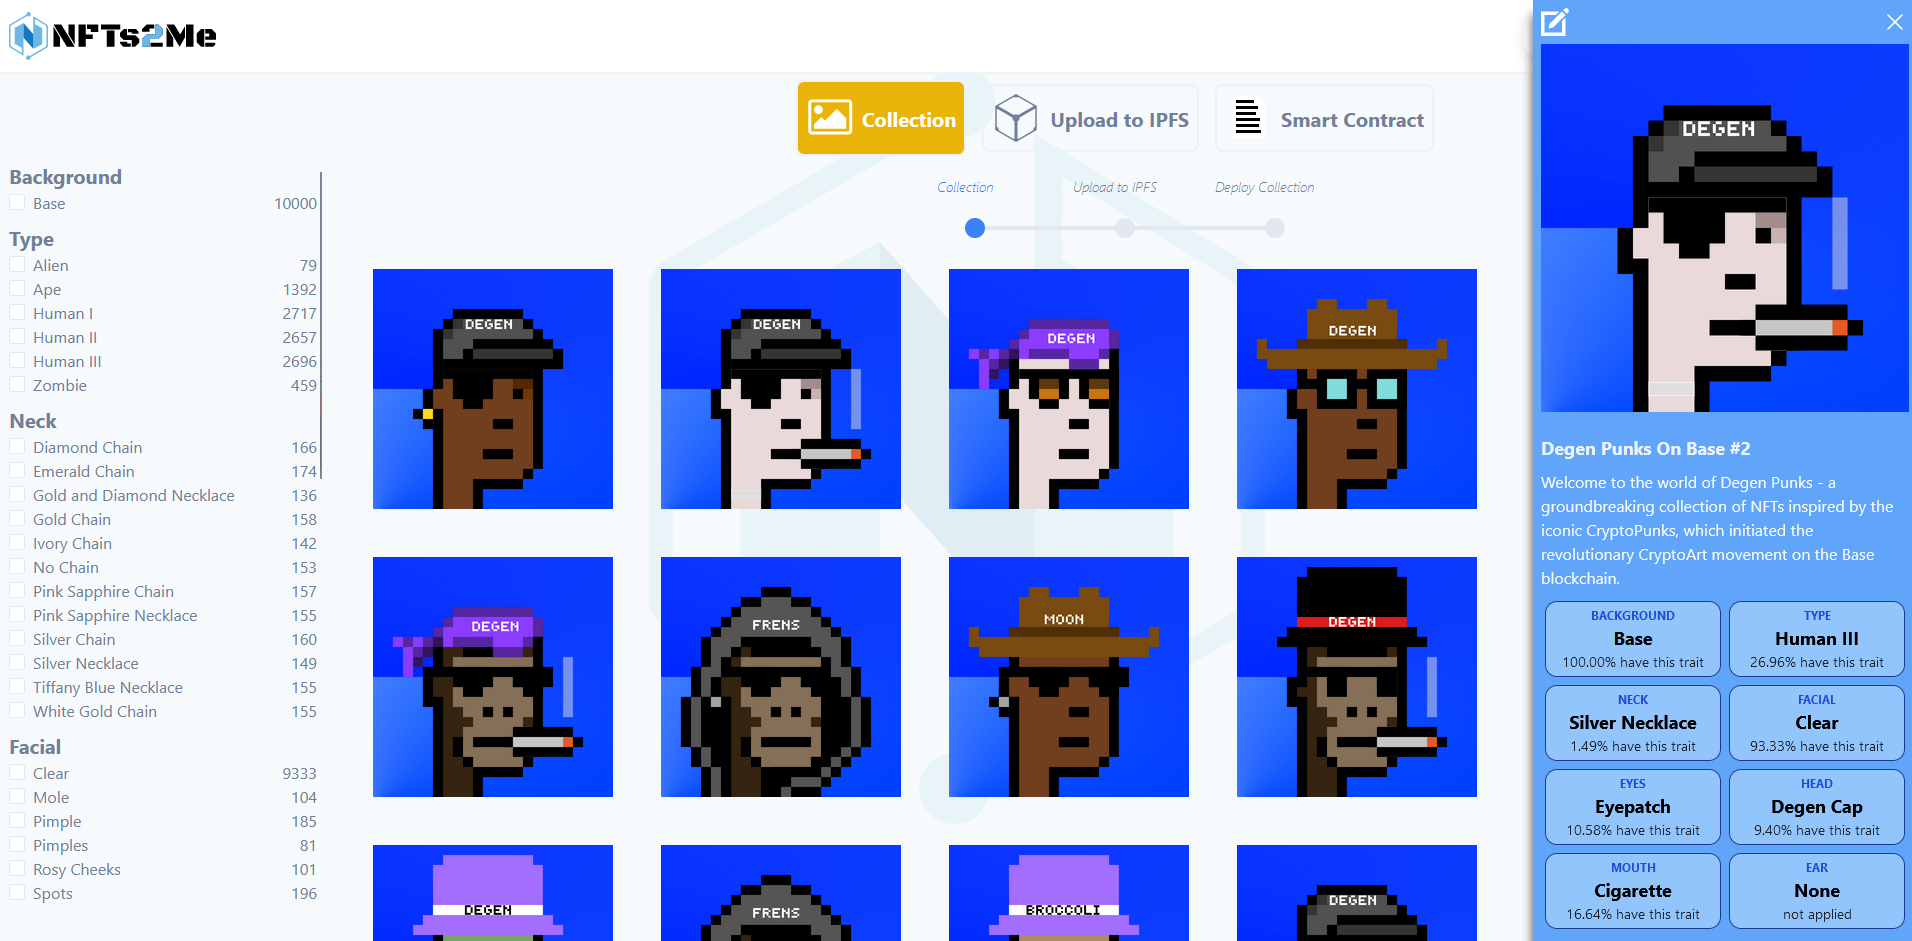
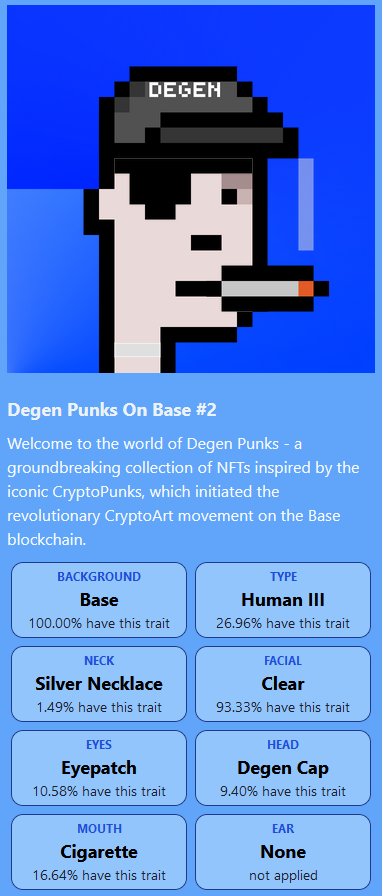
Once the collection is deployed, the token detail modal will display the tokens' metadata attributes. Click on a token to display the detailed model.
### Save collection metadata
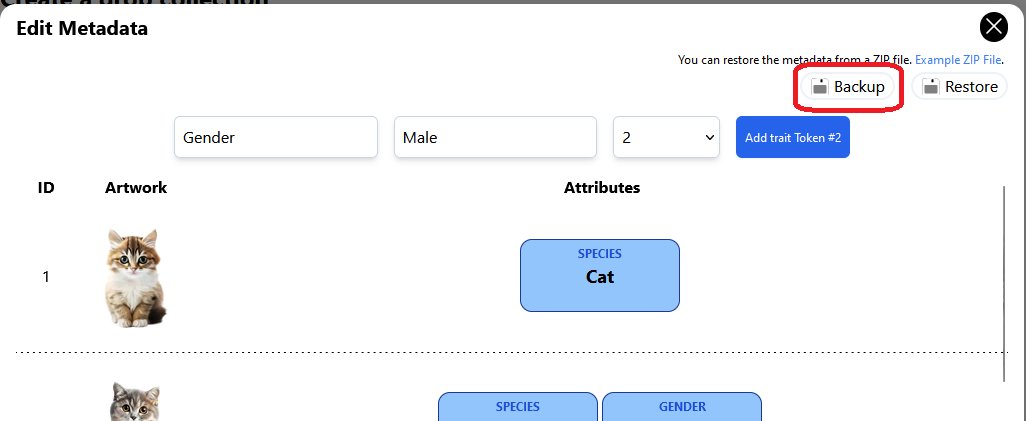
Before deploying the collection, you can save the metadata as a .zip file. This allows you to deploy new similar collections with the same metadata or use it as a template for new collections. Furthermore, it serves as a backup for future disasters.
Click on the "Backup" button, and a zip file with the collection metadata will be downloaded:
Then, if you open the zip file, you will see a JSON file for each token. The file name corresponds to the token's identifier.
If you open a token file, you will see metadata attributes for that specific token.
### How can I restore saved metadata?
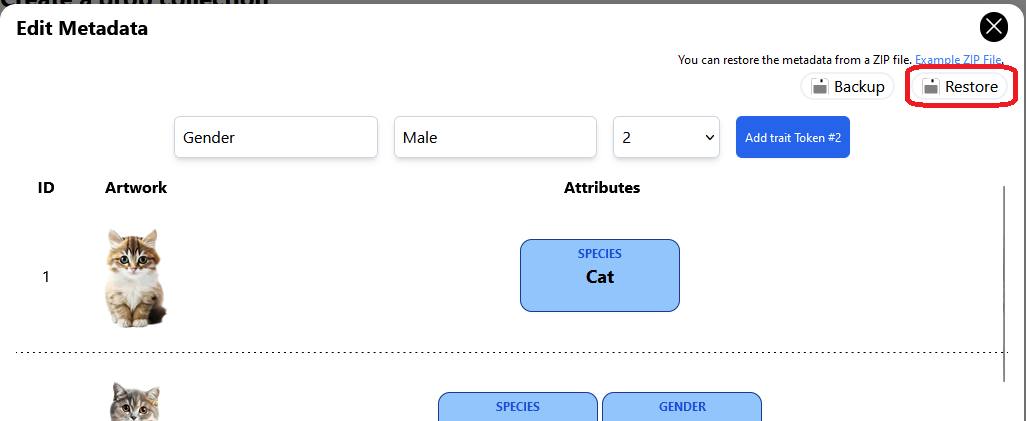
As mentioned earlier, you can restore saved metadata to another collection or deploy the same one again. You only have to click the "Restore" button after the artwork has been uploaded. Remember to click the "Edit metadata" button to display the metadata modal.
An advertisement dialog will be displayed to inform you that all metadata will be replaced.
### "**Generative Art**" collections
In this type of project, we automatically generate the metadata for you, offering individual editing if necessary.
The tool automatically generates a trait for each layer, setting the value defined by the layer and determining the trait's rarity.
Token layers metadata automatically generated
### Hide metadata. What's the placeholder?
You can deploy a collection in which the artwork and the metadata are hidden. You can reveal them from the beginning, meaning all metadata will be public, or you can use a placeholder image to conceal it until you decide to reveal it. If you choose to hide it using a placeholder, not only will its image be hidden, but also its name, description, and metadata. Once the information is revealed, it will be fixed on the blockchain, and you won't be able to change it.
The tool provides you with the option to choose for this purpose. If you go to the "Advanced Options" tab, you will see an option called "Placeholder / Reveal Metadata." You can switch between fixed and delayed reveal.
The placeholder is a temporary image and metadata displayed for every NFT in your collection. It serves as a way to hide or delay the actual images during the minting phase. You can choose when to reveal the actual metadata. We don't upload any on-chain information until you decide to do so. However, once uploaded, it can't be changed.
In the example provided, we have set a cat placeholder, as you can see:
Then the placeholder image is shown on the minting page:
If you click on the NFT to show its details, you can see that all information is hidden, and only the placeholder is shown:
When you want to reveal both the image and metadata, you only have to go to the "Mint Settings" option on your project dashboard. Scroll down to arrive at the "Metadata/Placeholder" section:
Click the "Reveal Metadata and Fix on Blockchain" button to reveal the information. This action will fix that information on the blockchain associated with your collection contract. You must confirm it in your wallet and wait while the metadata is revealed and fixed to the blockchain.
Once fixed, the section will change its display mode, and you will see a notification confirming that the metadata has been fixed.
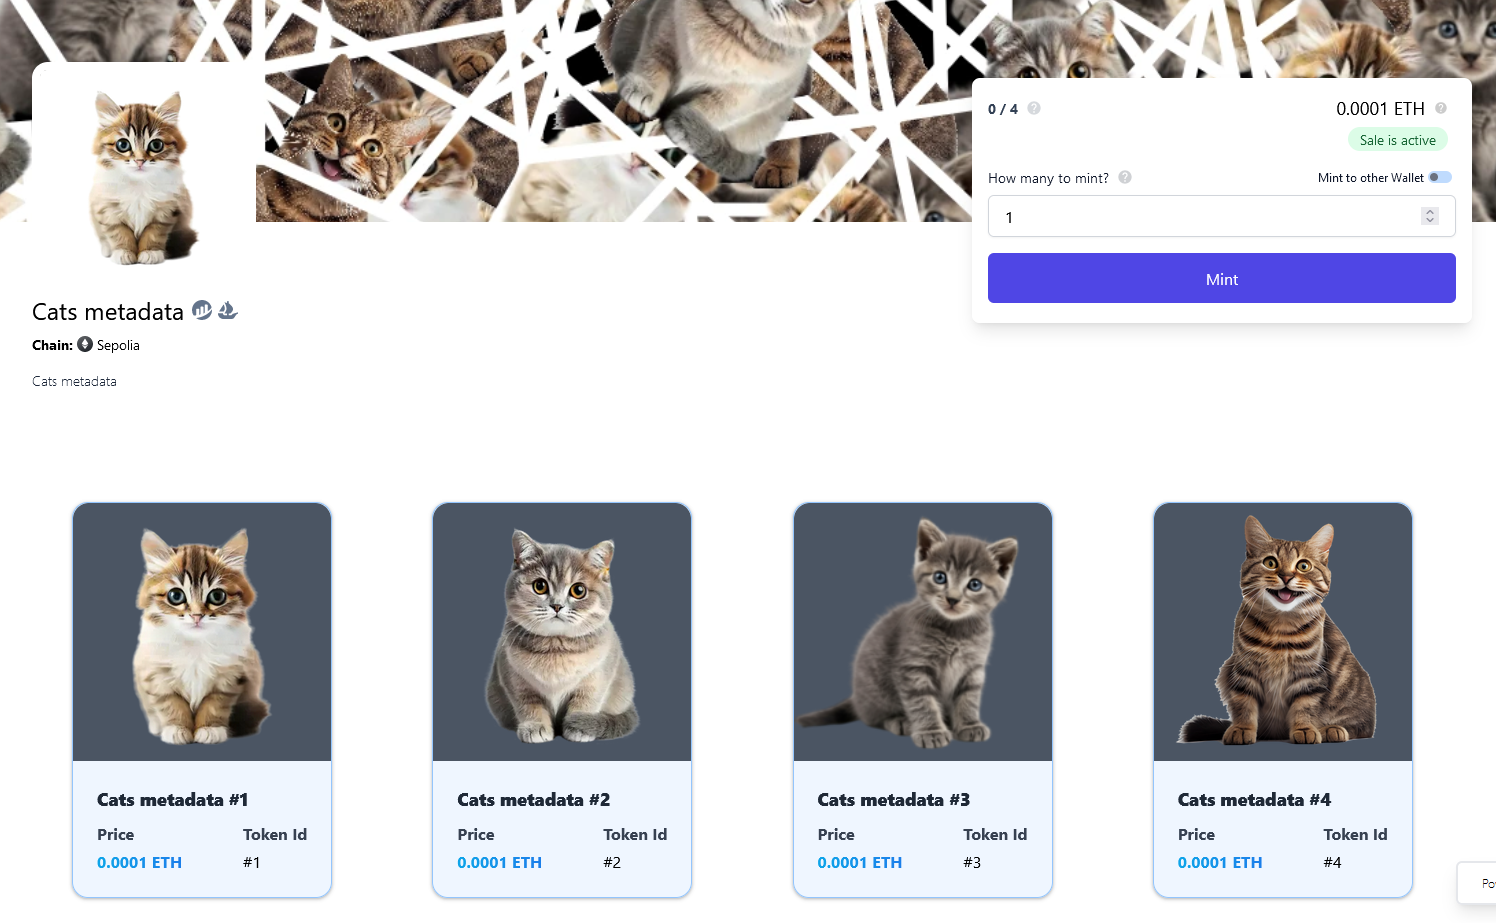
Finally, the image and metadata are revealed if we open the minting page.
.png?alt=media)
.png?alt=media)
.png?alt=media)
.png?alt=media)
.png?alt=media)
.png?alt=media)
.png?alt=media)
.png?alt=media)
.png?alt=media)
.png?alt=media)
.png?alt=media)
.png?alt=media)
.png?alt=media)
.png?alt=media)
.png?alt=media)
.png?alt=media)
.png?alt=media)
.png?alt=media)
.png?alt=media)